Resealing fixed portlights
For the Catalina 36 IA community...
During last summer's trip to Norway Easy's deadlights (fixed portlights) started leaking. For two reasons, initially I didn't really pay attention to it. One: we were close hauled in 40 - 45 knots winds, doing 3 knots against 3.5 meter (11.5 feet) waves.
Two: We were thoroughly wet ourselves and the little volume of water from the window didn't match what we brought in ourselves, while entering the cabin for navigation, pills and the occasional 'tot of Beerenburg'.
However the water did spoil the books - stored underneath the portlight - and this winter I noticed them leaking even during the frequent rains. Time for corrective action...

 The installed deadlights are old-type Lewmar type 2 fixed portlights. Other than some Catanina's, that were fitted with the more rounded RE type portlights. One characteristic of the old type is, that it was manufactured using two half frames with horizontal gaskets where the two halves meet. I'll refrain from further comments on this construction, but from the pictures below is quite obvious that an aged gasket creates a leak path. It might even be a sizable leak.
Almost impossible to remove the portlight without damaging its frame or the boat's gelcoat, the choices are:
1. Try to reseal the gaskets
2. Remove the portlight and replace it
Pictures below demonstrate that option 1 is the cheapest and quickest, by far.
Removing the gaskets is easy. Pliers will do, though care is needed not to damage/scratch the soft aluminum frame. Filling the resulting gap with sealant is easy. One guess where that boat's name comes from...
Before applying the sealant, properly protect the area with tape. For me, the care with which the tape is applied, pretty much determines the end result. With one of the portlights removed for replacement, I had the luxury of testing my solution on the old one first, before trying it on my precious boat...
That test was valuable. Impatient for results, I started filling the joint from the outside first; this is the visible part. On the inside of the boat, the portlight has a plastic cover, hiding the portlight's construction and joint.
The predictable result, when I turned the porthole over, was that the sealant didn't completely fill the joint. This is a dilemma:
During last summer's trip to Norway Easy's deadlights (fixed portlights) started leaking. For two reasons, initially I didn't really pay attention to it. One: we were close hauled in 40 - 45 knots winds, doing 3 knots against 3.5 meter (11.5 feet) waves.
Two: We were thoroughly wet ourselves and the little volume of water from the window didn't match what we brought in ourselves, while entering the cabin for navigation, pills and the occasional 'tot of Beerenburg'.
However the water did spoil the books - stored underneath the portlight - and this winter I noticed them leaking even during the frequent rains. Time for corrective action...


Almost impossible to remove the portlight without damaging its frame or the boat's gelcoat, the choices are:
1. Try to reseal the gaskets
2. Remove the portlight and replace it
Pictures below demonstrate that option 1 is the cheapest and quickest, by far.
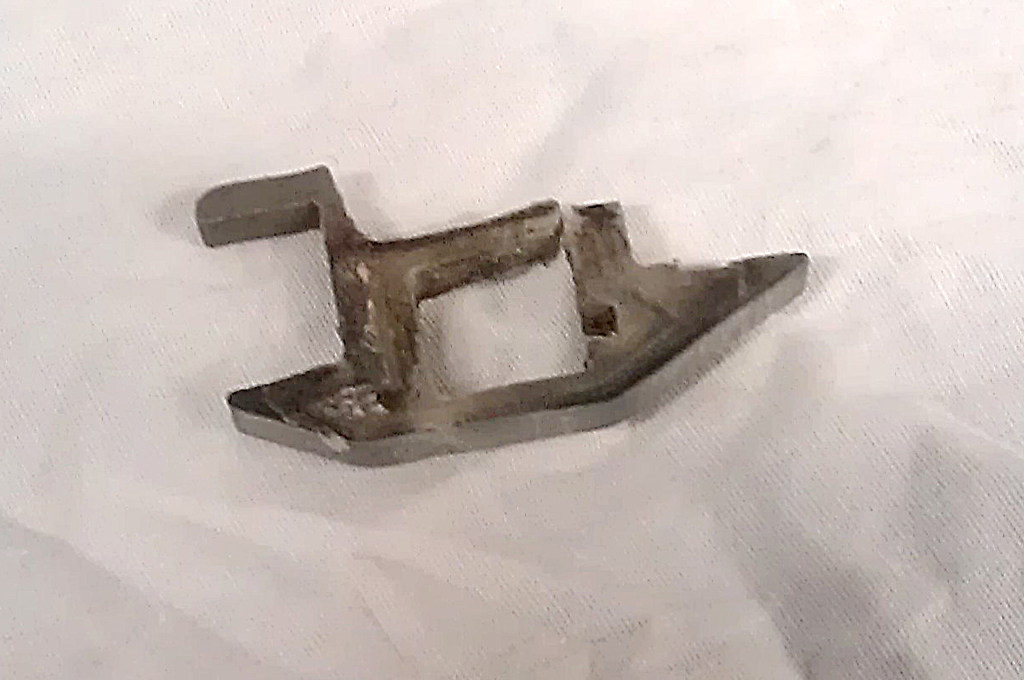
  |
| Removing the gasket (left) and the portlight with one gasket in place and one removed (right) |
Removing the gaskets is easy. Pliers will do, though care is needed not to damage/scratch the soft aluminum frame. Filling the resulting gap with sealant is easy. One guess where that boat's name comes from...
 |
| What's left of the gasket; discoloration and dirt indicate that some water ingress has taken place... |
 |
| As a test, I applied my solution first on an old and damaged porthole that I removed completely. |
The predictable result, when I turned the porthole over, was that the sealant didn't completely fill the joint. This is a dilemma:
- Reapplying sealant on the inside, while the sealant on the outside was still fresh, would push the sealant out on the outside, creating a mess (eager as a was, I had already wetted the area to remove excess sealant and removed the tape)
- Applying sealant on the inside, after the outside had dried, wouldn't create a uniform mass of sealant in the joint.
The big learning? Apply the sealant on the inside first - where it doesn't really matter that the bead is a bit messy - then apply on the outside.
Learning number two? Count to ten before you act...
  |
| The test joint after removing the tape (left); note the dents in the aluminum frame that were caused by the removal of the portlight from the hull. On the right the inside of the portlight, notable here that the sealant hasn't completely filled the joint between the two frame halves. |
The caulking:
- Clean the joint!
- The sealant I used was DL Chemicals Parabond 600 (grey); a siloxane based adhesive filler.
- I always tape the area around the 'bead' at home and I applied that same principle on these portlights; not everybody does that, but apparently I'm enough of an amateur to need it.
- After applying the sealant/caulk, I wet the area with a soap solution (hence the water on the pictures); the wetting prevents excess sealant from sticking to surfaces where you really don't want it. I also wet my hands and tools during removal of the excess sealant and a wet cloth to wipe lumps of caulk from the removal tool.
Much more experienced 'silicone gunners' than I, have put their best practice videos on Youtube...
Oh... the endresult:
All pictures were made with a mobile phone; illustrative I hope, but not top quality I'm afraid...
Oh... the endresult:
 |
| One joint caulked, the other good to go... |